
Print Template Tutorial
Ailit customized print templates are updated. The first, set Print Templates to support higher degree of freedom, make it support Customized Paper Size, Add More Information, such as store logo, QR code, and newly add a variety of editing tools to beautify the documents.Let's see how it works in the following:
Operation Path:[Settings] - [Print Templates]
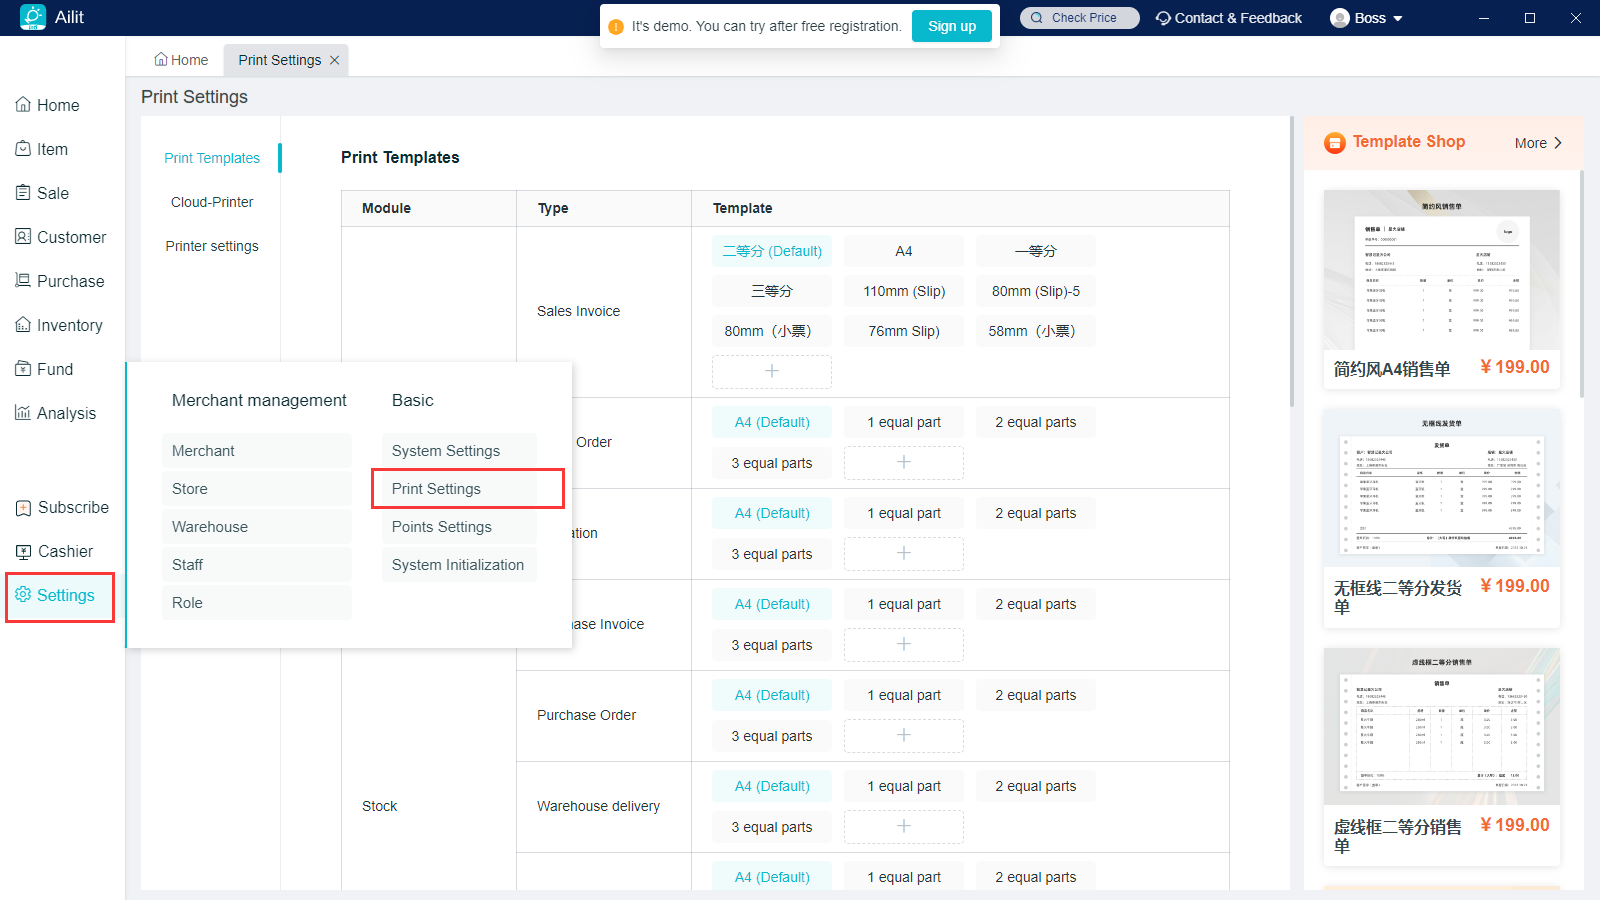
It currently supports the print of sales tickets and sales orders, purchase list, purchase orders and transfer orders, receipts and payment orders as well as product labels. Different documents support different print templates, so you can choose the corresponding print template according to your actual business needs to set and print.
The following takes the "Three Equal Parts" template of sales tickets as an example. Click on “Template” to enter the detailed template settings:
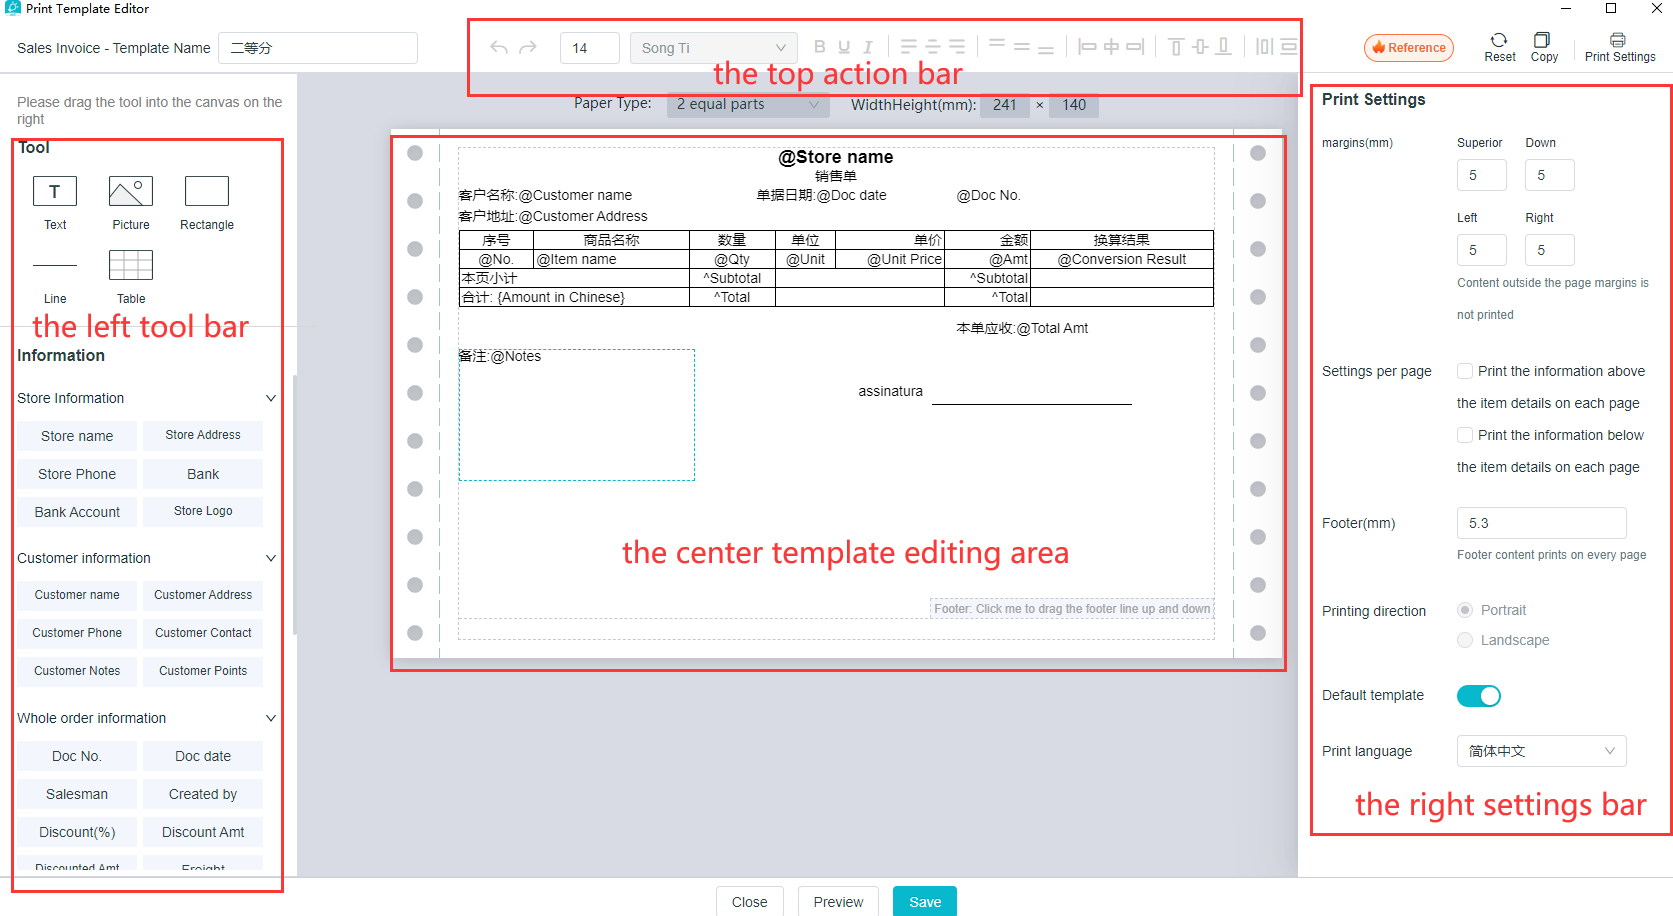
Enter the Print Template to see the top action bar, the left tool bar, the center template editing area, and the right settings bar
The print template currently seen is the default one, and can be operated according to the bosses' actual needs for their own business.
How to use the tool bar:
1、Operation: Click the mouse and long press to select, and make an overall arrangement and configuration after dragging the tool/information into [Any Position] in the canvas
2、Tools: Customized text/images/rectangles/line segments, functions to be used can be freely chosen as needed
Customized text
Customized text can be entered
Enter what needs to be specified in the template
Image
Images can be uploaded
Add the required images to the template, such as company logo, receipt code
Rectangle
Freely add types of wireframes
Add different types of wireframes
Line segment
Freely set the length and types of line segments
Cutting lines increase the aesthetics of the template
3、Information: System-preset fields, different documents support different fields added
How to use the template editing area:
1.Operation: Click to select the component, and Settings will appear on the right, which is set for individual component
- Each tool/information has different business attributes, and different tools/information can be separately set in the setting column
[1] Information Settings: Text contents can be set, and the information settings of texts include [Name] and [Value] contents. Some of the values support the setting of uppercase Chinese
(2) Style settings: Edit the frame style, frame width and height, font style, font size and alignment, etc.;
How to use the settings bar:
-
Operation: Click to select the component, and Settings will appear on the right, which is set for individual component
-
Each tool/information has different business attributes, and different tools/information can be separately set in the setting column
[1] Information Settings: Text contents can be set, and the information settings of texts include [Name] and [Value] contents. Some of the values support the setting of uppercase Chinese
(2) Style settings: Edit the frame style, frame width and height, font style, font size and alignment, etc.;
How to use the action bar:
1. Left: Setting the Template Name will be displayed in the list of print templates
2. Middle: Common Operations, the moving-in of the mouse shows instructions and shortcuts, including revocation/restoration, text size/font/style/position, alignment between multiple components and other editions. It supports unified editing of multiple contents
3. Right: Print Settings, enter the canvas and display settings by default, including page margins / print each page / page footer / print direction / default template
(1) Contents outside the page margins are not be printed by the printer;
(2) The printed range on each page is distinguished the top from the bottom based on the line at the form bottom;
(3) Footer contents are printed per page and can be set by dragging in the canvas;
(4) Landscape and portrait printing can be supported only by A4 paper type;
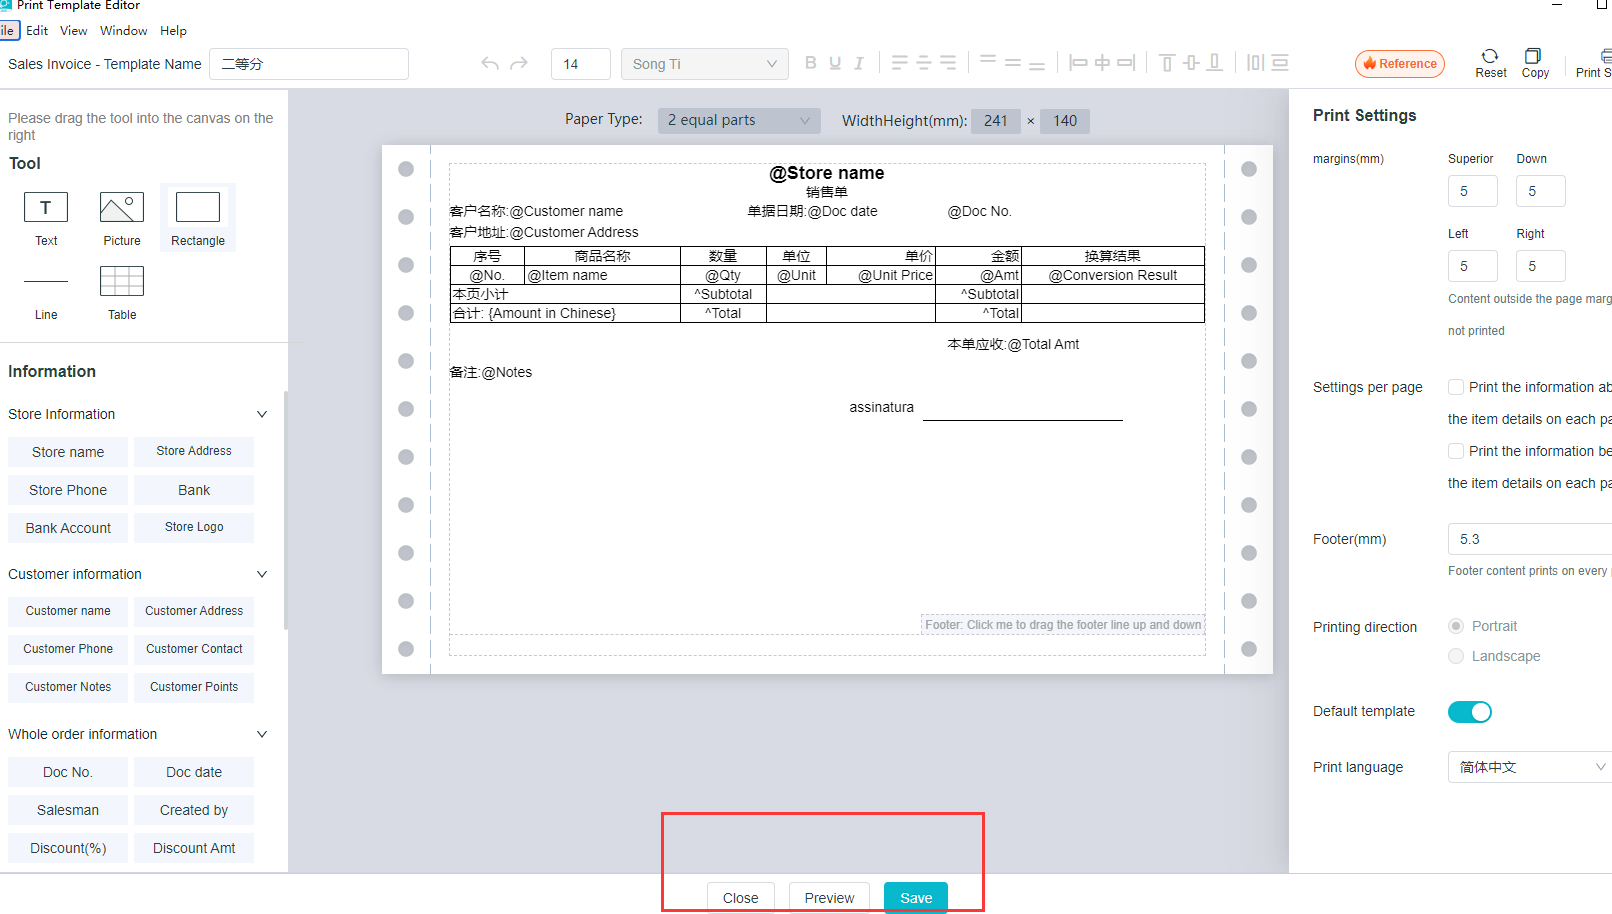
After the settings are completed, click on [Preview] to Detail your customized print template
Click on [Reset] will revert to the default template for that paper type
After confirmation of no error, click on [Save] to save the print template you have set